Wednesday, December 28, 2011

Filling In Time Playing With Letters.

At present I am in between projects, researching for one down the track, look out for it in September, and waiting for instructions for another.

So what better way to fill the time but to doodle with some letters which will be presented to a grandson as a decoration for his room.

Otherwise I have been swimming , reading and sorting the studio. There is always some thing I can do as well as catching up on some interesting blogsites etc.


This is as far as I have been able to go until I talk to his mum re colours . 
 More on this later......


Monday, December 19, 2011

Christmas Wishes for 2011

Christmas a time for family, love, peace and a good wine. Being a person who possesses an interest in art, creating and appreciating others pieces I like to buy handmade decorations as compared to the commercially made products. After all it is a time for sharing be it with strangers, neighbours or my favourite people , grandchildren. My granddaughter , all of five years old loves to do art with Nana so we had a lovely day together making decorations and decorating our tree.


Family tree with handmade decorations, (2 boxes and star on top at the back.)


A special one I love which I bought at a local gift shop in a town half an hours drive away last year. It is made from soft fabric and joined together separately .


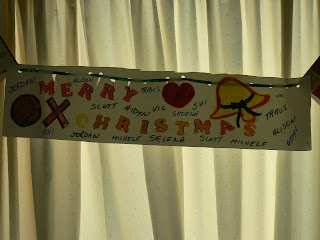
Family banner compliments from my granddaughter and me.


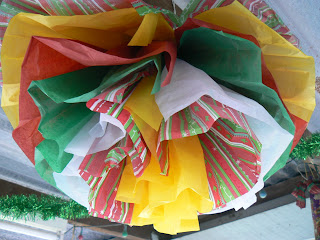
My Christmas pom pom made from tissue paper and not some thing one can be in a hurry to do as it tears too easily. I made about four different sizes practising and one has a scalloped edge, no limit to one's imagination.Glitter , gold stars etc are things the little hands could do to help.
I remember making the crepe paper chains each year as a child so they will be on the "new list" for 2012.


Scalloped edge version. In the background is one I made a few years ago from styrofoam balls , painted with paper cutouts added and varnished.  Some of these were also covered in Christmas fabric and coloured ribbons attatched to hang from.


Friday, November 25, 2011

Printing with the Brayer Demonstration.

I have started with the registration paper and markings which I think all printmakers practise.
The first sheet is the registration paper with the size of the printing paper marked then the size of the plate is marked on the edges to be able to align the plate.
All these marks are transferred to the BACK of the printing papers for the edition.


Registration marks. Of course these are all aligned one on top of the other for printing.


Plate in position minus the ink, I wasn't printing today so this is a "special" effort, a dry run .


And this is how it looks ready to print.


Caution should be practised with the application of pressure .To avoid  the paper slipping I apply gentle pressure with one hand while rolling the brayer across making sure every portion has been printed. It is a slow process  and I do lift it from each side , very carefully  to check the print.
I have used the baren to print but found it moved the paper especially with oil based inks, maybe I just need more practise with that!


No I don't have three hands  hubby helped here with this shot.I don't usually print at home in this fashion with large prints as I have access to a friends press.


Wednesday, November 23, 2011

Silkcut v Vinyl./ Reduction plus Stencil.

Experimenting again and I used for the first time the new vinyl plates in a workshop back in September , 22nd and carved the owl on the reverse of that plate. As it turns out it is my favourite plate/image so have used it constantly but realise I can't keep producing the one image.
My next challenge was to use it as a reduction plate which presented me with a few hurdles. Knowing that it "stretches" I needed to stabilize the sides during the process.This meant I could reduce the edges so took a clue from screen printing days and made my own stencils to protect the printing paper. Also I wanted to use two different colours and designs from this plate so had to bear that in mind as well.
To make my own stencils I printed off the image first and kept that as a template but made sure I used reasonably thick paper to cut them out so they would last a few editions.

Original Plate.


Inked Plate.

Inked Plate with Stencil Added.

The Print.

The background was printed with a light colour first from the same size plate and reprinted with a slightly darker colour,working with tonal value here.


Some detail on the head and the background colour isn't as grey as this looks.

Because I had inky fingers after a few runs I just place some paper over those areas to protect the printing paper.


Reducing the belly area. I only do this once a definite decision has been made especially as I wanted to reuse the plate in another edition and another colour.

Now I started rethinking design in the wings just to add interest. The best part of using stencils is if they don't work then I can reduce the plate, once cut away I can't replace it!!

The stencil ready to be placed on the inked plate. Note the arrow lower right corner , this is always part of the registration process and thinking reverse position too.
Stencil and printed plate and it wasn't necessary to ink the complete plate but enough to cover the areas I wanted to print and to hold the stencil onto the plate.

Here's the result of that print and not sure I liked it after all so now I can change it to the reduction method.

I missed the registering a bit here and when I inked the blue/black wings I inked the branch in green .
In the end it's about a 7colour reduction/stencil print and I am happy enough with it.


Saturday, November 19, 2011

Tackling Tricks.

While working on a piece at home the brain was in overdrive, you all know what that feels like....
and to resolve a situation I found myself in I resorted to  what I call" trickery". These are little ways to help one out of a dilema and we come across them in many ways . I had two fine areas meeting and I wanted to print them in two different colours. Having thought about it for a long time and tried a few different "tricks" at home I decided to employ the use of brushes with oil based inks .
 
This is the first attempt applying the two colours.


Very carefully applying the last of colours pre printing.
I wasn't totally happy with the prints so chose to paint just the one colour and use the  small brayer as per normal for the other.


A very slow process to say nothing of an aching back!!
Once I printed from this plate it was easier with this process and I went on to print a reasonable edition. I know professional printmakers would have used this process anyhow but sometimes we need to work through ideas and "tricks" to find out what is best.It's all in the name of fun.


Friday, November 11, 2011

Experimenting,learning and having fun.

That's the name of the game.. right? well that's what I did a couple of weeks ago. After having admired a technique which I had read about and heard about before but never pratcised I put ink to paper so to speak. I bought one of those new double sided lino plates and inked it up minus any cuts. I must admit that I haven't practised the technique as per what I had read, I sort of changed it to suit my desire as I went along, sort of letting it develop as I went.

Fist I inked the plate in a light toned colour, printed it , cleaned it  mixed a darker colour and ripped some paper stencils. Then I reinked the plate in the second colour and placed it in position re registrations  marks as you do...., put the paper stencils on top of the plate, placed the printing paper on top and print.   Here's that result.. quite nice I thought so feeling chuffed at this stage. Moving on to.......

this,colur number three (the square shape) only because I liked some of the marking in this lino plate but felt the shape itself spoilt the design. But I kept going just to see what would happen and mixed a fourth colour for one of my favourite lino plates  the turtle, it pays to not destroy them sometimes as one can experiment with them.In the end it became a four colour print.Still feeling pretty good with my efforts I decided to have another go.

By now I  was hankering for a coffee so made one which was drunk when cold as was forgotten!
This often happens to my hot drinks when I am working.
Preprinting second colour with stencil in place.


Here I have printed the background colour, cleaned the plate , decided on shapes and cut out the stencil and placed over the second colour on the plate and printed that with this image that follows.

As we all know it prints in reverse.

At present I can see tadpoles which weren't part of the theme at the time.

Following through with my favourite plate I cut around the turtle to give a cleaner edge and inked it up in a darker colour, printed it and

there you have it.

Size of lino plate is 150mmx200mm so it's not a big print. Paper is Fabriano Rosapina white 220 g.
I used water based inks by Schmincke which I am enjoying .These were handpulled using an old brayer as my "press"
I like the easy cleaning for experimenting sessions compared to the slower cleaning process with oil based inks which I prefer for quality prints. Using this process I can sort any possible problems before attempting quality prints.






Saturday, October 22, 2011

Success at Last.

There was a point to my marbling escapade last weekend , not only that I wanted to do more for future use but I had a project in mind. My friend is having a birthday tomorrow , darn things crop up every year....so we had a lovely lunch at a local resturant with our other friend  yesterday and a good time was had by all.

The following photos are her gift of a book I had made  which some readers may recognize. I couldn't leave it alone as not totally happy with the previous works and needed to satify the urge to improve and try to produce something close to what I had originally though of. Yes ,I am happy with it so can move on now.

Birthday Gift.
The book ends I prepared some paste paper and thumb printed it and these were also used in the cutout areas through the book.

Signed, sealed and delivered.

I enjoyed the challenge of changing an original into another acceptable piece of art work, nothing is ever "lost".


 I

Wednesday, October 19, 2011

Marbling Fun

I'd had the kit ordered and stored at home for quite a while, always on the back burner type of situation. So last weekend I organised myself to have a play. I would be showing my age re measuring out and converting it all and ended up with twice the amount of liquid! Anyhow it wasn't wasted as it was very handy to have a second helping after the first run.Here are the results.

This was the experimental piece.


The red is very dominate even using only small amounts of the ink, but I like the other colours peeping through.

I would love to be able to do the beautiful feathered style of marks that we see in bookends of the classics. I must allow my abstract side show somewhere though musn't I ?


A bit more colour and the red not so dominate. Now to make some books,collagraphs to use these specimens.


Wednesday, September 28, 2011

Mix and Match.

After the workshop on the weekend I spent my nana free day yesterday messing about in the studio as you do. Tidied up here and there eventually experimenting with two plates and colours. For an abstract it's okay and I like it.

 I don't mind which way it is turned either also I 'm learning to like the non inked solid areas, adds another dimension.

Thursday, September 22, 2011

Doodles.

Back again and I went through my journals and knew I had doodles there somewhere. This time I had drawn the images first then doodled the centres. This seemed to work better for me.
Horse doodling back in 2009.


And this led to a chicken...
a couple of teapots...

and I am appreciating them and doodling more now.  However no time just now as must be off to do other things.

Creative results from a workshop

Last Sunday I attended a workshop with my monthly printing group. The basic instructions were to produce a doodle, add another image and at your own choice to disregard the outer edge or to use it. Having made nice marks from the doodle we then chose the best or favoured ones to place our image there and introduce those marks into it as a final image.We printed using the good old fashioned way with the spoon, something else I don't practise as I have the use of a friends press when I need to print or I use an old brayer at home. I used the spoon for all of these prints.
I usually use silkcut lino but was keen to try the "plastic" lino and at present I won't swap it for the silkcut as I don't much like the top layer but it is nice and smooth and you get the use of both sides.
 It is good for home printing and I was reasonably happy with the trials.
                                                        

This is Sunday's plate from the workshop and I admit to struggling with "doodling" as I don't doodle much and also had to learn how to cut this particular plate material.


My first print onto previously painted paper and folks is was a tree image but seems to have "grown" into a human form. It resembles images I had done at a ten day workshop in Yeppoon a few years ago and his theme was the figure in the landscape, well it seems to have stuck!!!


Second print but this time with a bit of chin colle which changes it again. I like this one and the technique.

My Midnight Owl....

The reverse side of the "plastic" plate and like a dog at a bone I was up till midnight last night experimenting and just needed to know what I could do.

Test print number one and happy enough with the result, oh! I also learnt to cut with a curved blade .


It's about 11.15 by now but still not ready to concede defeat so attempted intaglio inking which I have done once before and it is hard work but worth the effort though not at midnight and spoon printing.It will be a better result when printed on my friend's press but I can work with this.
More to follow on doodling.


Thursday, September 15, 2011

A Wonderful Gift

I am a lucky lady to have a sister though not a practising artist but who does appreciate many forms of art which allows us to share some great experiences and conversations.A few years ago we travelled to Melbourne for Phantom of the Opera, my very first live opera so very special memories  and she has recently returned from Melbourne to see the Tutankhamen Exhibition , lucky lady.
Side view of my new toy.

In  my mail today was this wonderful gift she bought from the markets and very generously sent to me. Well haven't I  been having fun this afternoon playing which has presented me with ideas for the future so I shall endeavour to bring them to fruition soon.Now who's the lucky lady !!!!Many thanks G.


Design of the stamp and I can tell you this is as exciting as receiving a book!!Book Art Object people 
and regular followers will know about this.

Testing, testing 1.. 2.. 3....